
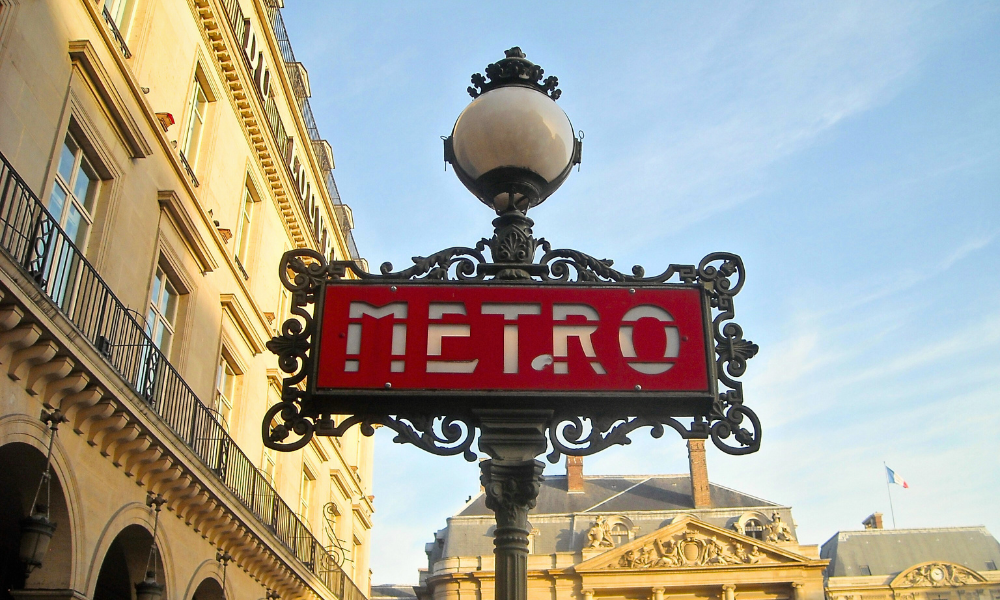
The first time I went to Paris, I wasn’t prepared for the maze that metro stations can be.
I walked down the stairs of a station thinking it would be simple—and suddenly found myself surrounded by colorful maps, French signs, endless corridors, and line names that made absolutely no sense to me at that moment. I walked too much, ended up on the wrong platform, turned back, went up stairs, then down again. More than once, I spent more time trying to understand the station and how to get out of it than actually seeing the wonders Paris has to offer.
")
Over time (and after getting lost a few times), I realized the system isn’t chaotic at all. It’s logical, efficient, and—once you understand it—becomes the greatest ally for anyone who wants to explore the city at a relaxed pace, without relying on taxis or ride-sharing apps all the time.
This guide was born from that exact journey: from confusion to clarity. Here, I’ve gathered everything I wish I had known before my first trip—explained in a simple, practical, no-stress way. So you don’t feel lost, don’t waste precious travel time, and can move through Paris station by station with confidence.
Understanding Paris public transportation isn’t just about getting around—it’s about gaining the freedom to truly experience the city.
Welcome to Letter’s travel tips.

What to Do in Paris in 5 Days — A Complete Itinerary for the City of Light
Understanding the map
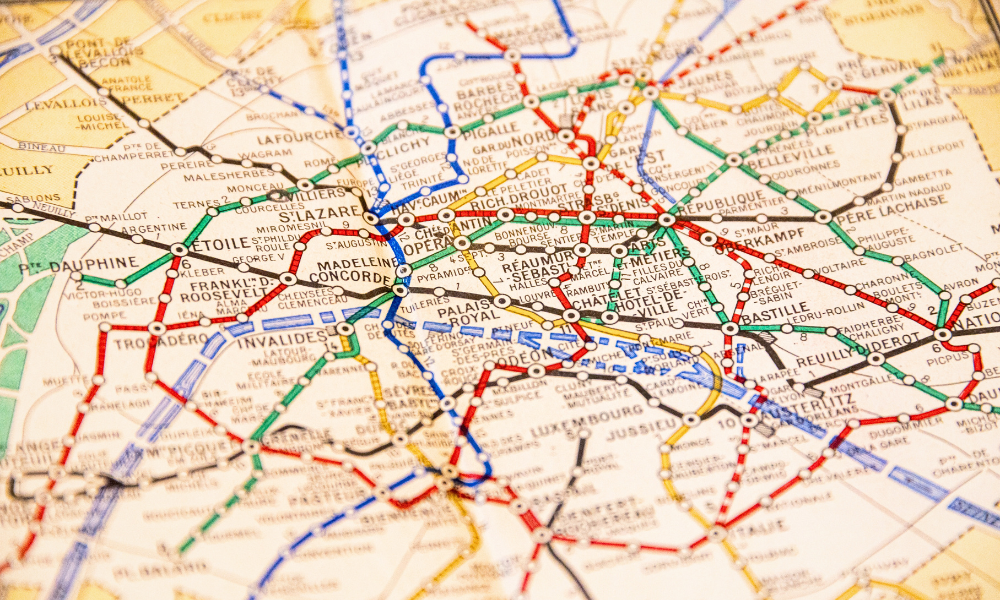
At first glance, the Paris metro map looks overwhelming: lots of colors, intersecting lines, letters mixed with numbers. But the truth is simple—you don’t need to understand everything. You only need to understand the essentials.
The Paris metro works like a well-organized web, and everything starts with three key pieces of information: line, direction, and exit station.
Keep those in mind, and everything else falls into place.
Metro lines
Paris has 14 main metro lines, numbered 1 to 14, each identified by a color on the map. Together, they cover almost the entire city and connect the main neighborhoods and tourist attractions.
In addition to the metro, there are the RER trains (lines A, B, C, D, and E), which also run through Paris but continue on to more distant areas and neighboring cities. For visitors, the RER is usually used for specific trips, such as:
- Airports (Charles de Gaulle and Orly)
- Disneyland Paris
- Palace of Versailles
Metro vs. RER — what’s the difference?
- Metro:
- Numbered lines (1–14)
- Stations closer together
- Ideal for moving around within Paris
- RER:
- Lettered lines (A, B, C…)
- Faster trains with fewer stops
- Connect Paris to the surrounding areas
Within the city, you may not even notice whether you’re on the metro or the RER—but the way you read the map is exactly the same. Within central Paris, in most cases, the regular metro is more than enough.
How to choose the right direction
Here’s a detail that changes everything—and that many people learn too late: On the metro, you never travel “north” or “south.” You always travel toward the name of the final station on the line.
For example:
- Line 1 → direction La Défense
- Line 6 → direction Nation
- Line 4 → direction Bagneux – Lucie Aubrac
These names appear on all signs, platform entrances, and trains. If the final station name doesn’t match what you wrote down, you’re going the wrong way—even if the line number is correct.
Before you even go down the station stairs, define clearly in your mind:
- Which line you’re taking
- In which direction
- At which station you’ll get off
Once that’s clear, the metro stops being a labyrinth and becomes a path.
I always say that Paris is meant to be discovered on foot. If you have the energy, walking its streets can turn your trip into an even more enchanting experience.
Reading Paris Metro Signs Without Losing Your Cool
Once you understand the map, the Paris metro starts to speak to you—through signs, arrows, and key words that may seem confusing at first, but actually follow a surprisingly gentle logic.
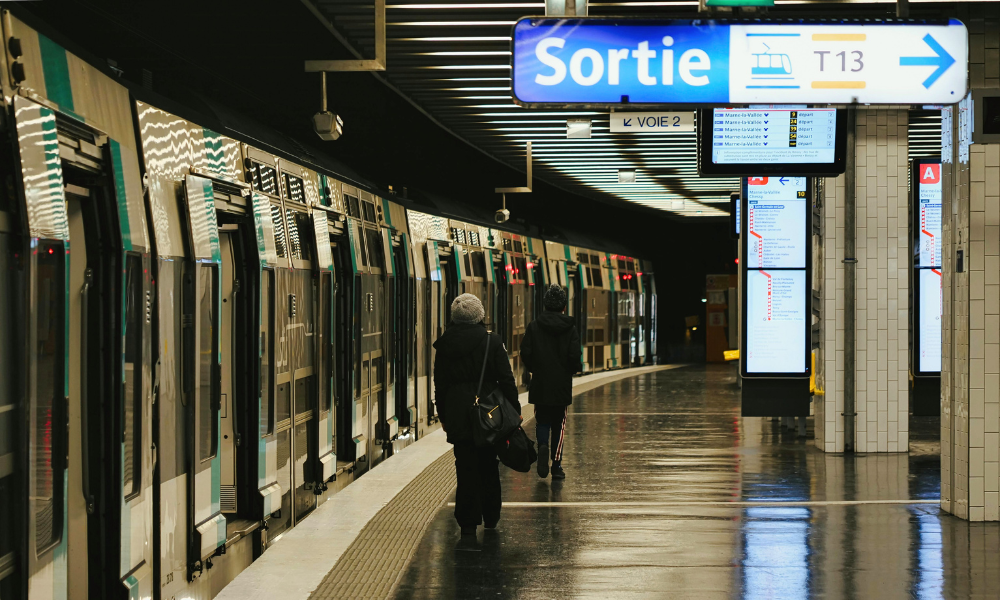
Inside the stations, everything revolves around three words you’ll see again and again: Correspondance Ligne, Direction, and Sortie.
Correspondance:
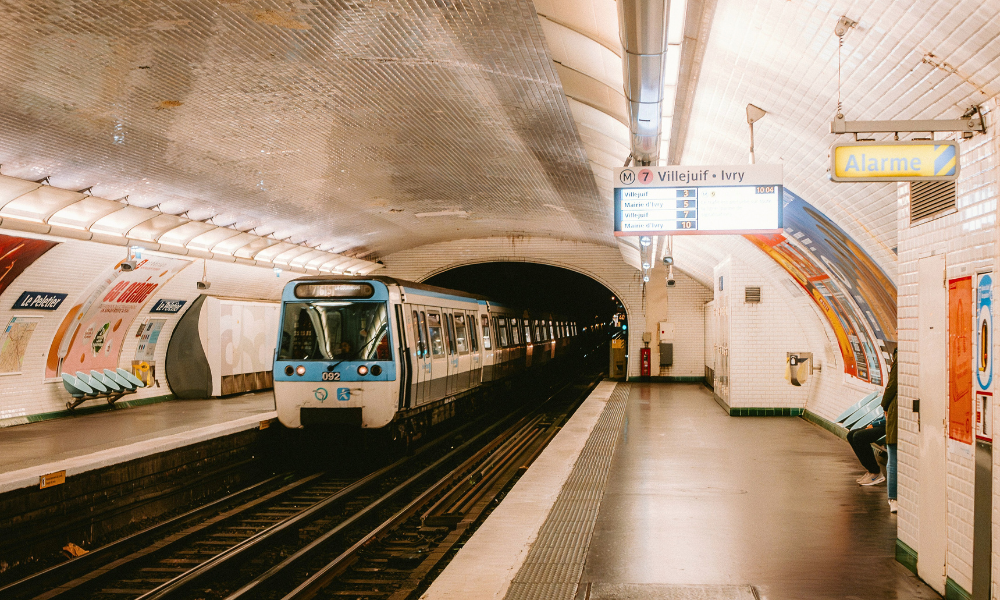
As you walk through the corridors, always look for the word “Correspondance.” It indicates connections between lines. Right below it, you’ll see the line number and its color, exactly as shown on the official metro map.
For example:
Correspondance Ligne 6: This simply means — “this way to transfer to Line 6.”
Direction:
On the platforms, the most important information isn’t the name of the station you’re in—but the name of the final station on the line. Each line runs in two directions, always indicated by the last stop on the route.
For example:
- Line 1 – Direction La Défense
- Line 1 – Direction Château de Vincennes
If you noted or saved in an app that you need to go toward La Défense, simply check whether that name appears on the platform signs. If it does, you’re in the right place. This simple habit helps you avoid the most common mistake visitors make in Paris: boarding the right train, but in the wrong direction.
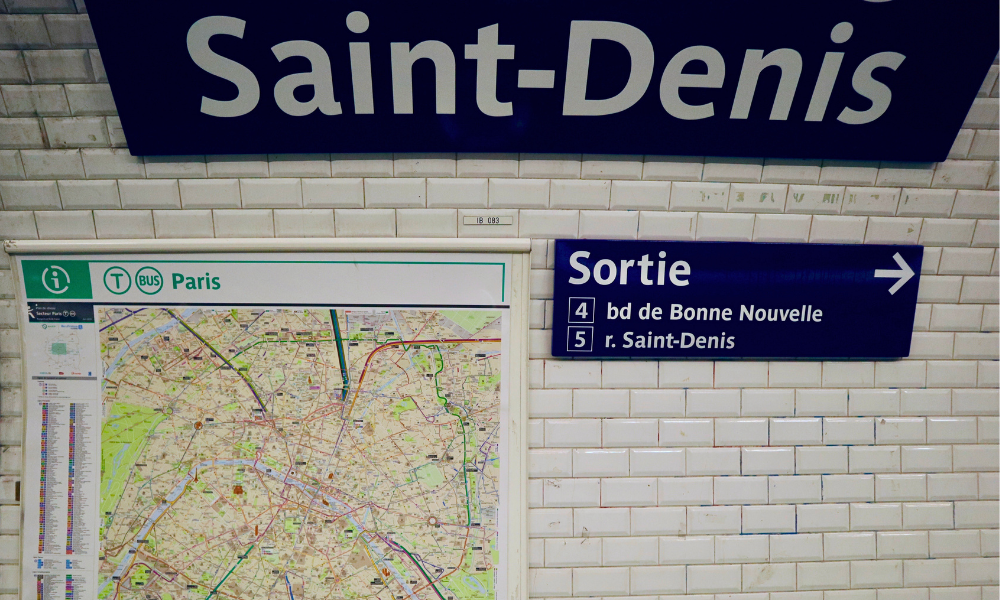
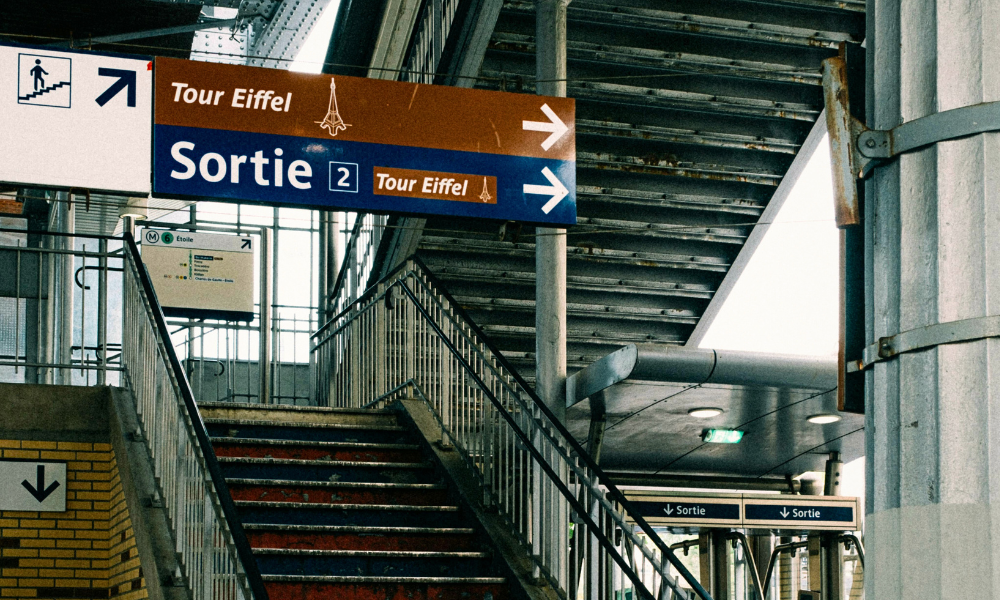
Sortie:
You’ve arrived at your station. Now comes a part many people overlook—and end up walking much more than necessary.
The “Sortie” signs indicate station exits. Many are numbered (Sortie 1, Sortie 2) or linked to street names and landmarks. Before heading up the stairs, take a moment to look at the panels near the exits. You’ll usually find a “Plan du Quartier”, a neighborhood map showing exactly where each exit leads.
Choosing the right exit can mean:
- Stepping out right in front of the museum you want to visit
- Avoiding wide, busy avenues
- Skipping unnecessary loops around the block
In a well-planned itinerary, this makes all the difference—especially in a city where you walk as much as you do in Paris.
One small detail that changes everything: The Paris metro doesn’t demand speed—it asks for attention and calm. When you pause for a few seconds, read the sign attentively, and double-check the direction, everything starts to flow. And suddenly, that underground labyrinth becomes just another tranquil way of crossing the city.
Practical Strategy
Before You Go: Plan Carefully
Before stepping onto the platform, pause for a moment and jot down a few things:
- Which station do you want to reach? Write it down or save it on your phone. This alone brings peace of mind.
- Which line and direction do you need? Don’t get distracted by colors—the most important detail is the name of the final station on the line.
- Will you need to change lines? Note the sequence. Small details prevent long detours.
Confirm the Direction When You Reach the Platform
- Look for the final station name on the platform signs. If it’s not the one you wrote down, take a deep breath—that train is going in the wrong direction.
- Ignore distractions: ads, too many colors, extra signs. Focus only on line + direction.
When Changing Lines: Follow the Flow, but Stay Alert
- Follow the “Correspondance” signs and the number of the line you need.
- In huge stations (Châtelet, Gare de Lyon, Montparnasse), the crowds can feel overwhelming, but every corridor is connected in a logical manner.
- A small secret: breathe slowly and walk calmly. Even during rush hour, when trains feel packed like sardines, patience goes a long way.
Choose the Right Exit (“Sortie”)
- Each station has several numbered exits. Not all of them lead to the same place.
- Check the Plan du Quartier near the exits. It shows a neighborhood map and helps you avoid unnecessary walking.
- Think of each Sortie as a magical door: one takes you straight to the café you wanted, another leaves you several blocks away.
Real Example: From the Eiffel Tower to the Louvre

Imagine you’re making this trip:
- You’re at Bir-Hakeim station (Line 6), near the Eiffel Tower.
- You write down: Line 6, direction Nation (the final station).
- You go down to the platform and confirm: signs say Nation → perfect, right direction.
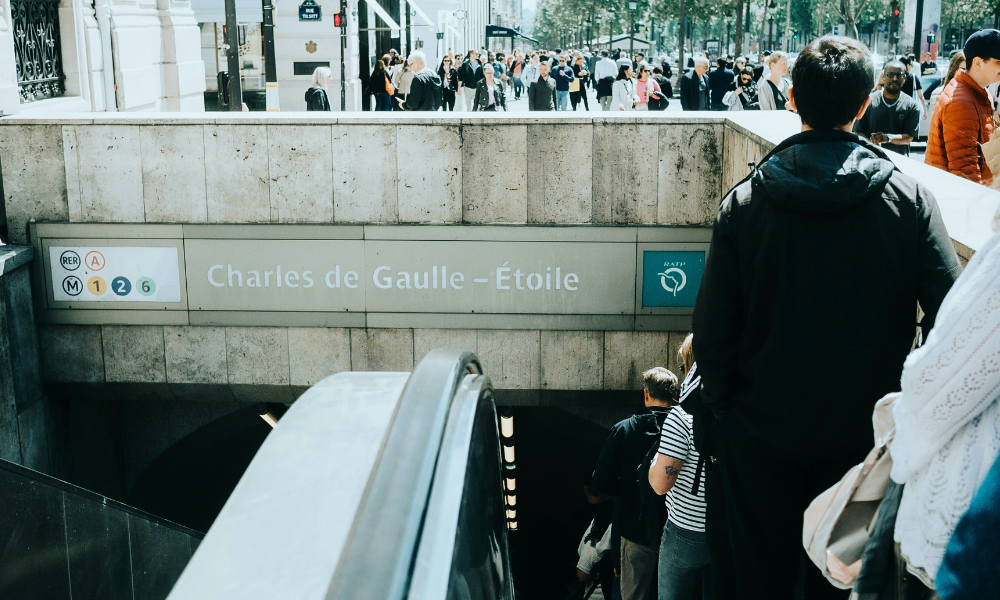
- You travel to Charles de Gaulle – Étoile station and change to Line 1, direction Château de Vincennes.
- You follow the Correspondance Ligne 1 signs—easy to spot, just follow the flow and confirm the direction.
- You arrive at Palais Royal – Musée du Louvre station. You check the Plan du Quartier, see that Sortie 1 leads directly to the museum—and you’re out, exactly where you wanted to be, with time to enjoy the streets along the way.
See how simple it becomes? Each step is just a small decision. And once you get the hang of it, the metro turns into a friendly network that takes you to every magical corner of Paris.
Tickets, Passes, and Zones: How Not to Get Lost in the Ticket System
For visitors, everything boils down to three simple choices: single tickets, daily passes, or weekly/monthly passes. And what about zones? Take a deep breath—most tourist attractions are within Zones 1 and 2, so you usually don’t need to worry too much.
The real secret is understanding how the system works in practice, without being intimidated by maps or tables that look like they’re from another planet.
Zones Exist, But They Don’t Have to Be Scary
The Paris region, known as Île-de-France, is divided into five concentric zones:
- Zones 1–2: Central Paris, where most tourist attractions are located
- Zones 3–5: Suburbs and surrounding areas (airports, Disneyland, Versailles)
A basic metro/RER ticket costs around €2.55 and covers travel within central Paris (Zones 1–2). Zones only really matter if you’re using special passes like Navigo Semaine/Mois or traveling farther out, such as to the airport or Disneyland.
Which Pass Should You Choose?
Choosing the right pass may seem confusing at first, but in practice it’s quite simple. Here’s a clear, budget-friendly guide:
Single ticket: If you are spending 1 to 3 days in Paris and plan to visit only a few attractions in the center of Paris, the single ticket is ideal.
- Costs about €2.55 per trip, valid within Zones 1–2 in central Paris
- Available at ticket machines or station counters
- Always keep your ticket until you exit—inspectors do check, and fines are expensive
Simple, quick, and effortless—perfect for enjoying Paris lightly.
Daily Pass (Navigo Jour): If you’re planning a full day of sightseeing.
- Costs about €13.55 (Zones 1–2) or from €29.00 (Zones 1–5)
- Allows unlimited travel for one day
- Ideal for hopping between attractions without worrying about tickets
- Does not include airport travel—those tickets must be purchased separately
This is the perfect pass for seeing the best of Paris in a single day, uninterrupted.
Weekly / Monthly Pass (Navigo Semaine / Mois): If you’re staying 4 days or more, this is usually the best value.
- Navigo Semaine: around €32.40, valid for 7 consecutive days across all zones, including airports
- Navigo Mois: around €90.80, valid from the 1st to the last day of the month—ideal for longer stays
- Valid on metro, RER, trains, buses, and trams
- Purchased at ticket counters or machines, requires a photo and physical card
Imagine you’re staying 5 days in Paris and plan to:
- Visit the Louvre, Eiffel Tower, Sacré-Cœur, Versailles
- Travel to and from Charles de Gaulle Airport
How to plan:
- Use Navigo Semaine for metro and RER travel—it covers all zones.
- Airport trips are included, since the pass covers Zone 5.
- Result: you pay once and travel unlimited for 5 days.
- Financially, it’s far cheaper than buying multiple single tickets plus airport fares.
With this approach, you focus on enjoying Paris, not decoding ticket prices.
For occasional trips to attractions that are farther away, single tickets are often the best choice — simple, affordable, and commitment-free.
A pass only makes sense if your intention is to use public transportation very frequently during your stay.
How to Buy Public Transport Tickets in Paris Today: Cards, Apps & Mobile Payments
")
If you still remember those little paper ticket booklets from old Paris movies, you can forget about them—they’re slowly disappearing. Today, everything revolves around cards and digital systems, which are far more practical, fast, and secure.
The good news? This makes life much easier for travelers. No more losing tickets, struggling with coins at the machine, or standing in long lines. Nowadays, everything fits in the palm of your hand—or on a small, elegant card.
What You Need: A “Support”
To use the metro and RER today, you’ll need a physical or digital support. This can be:
- Navigo card (contactless and rechargeable)
- Contactless transport card purchased from RATP machines
- Mobile app that supports NFC or QR codes
For short stays, a contactless card or app is perfect. For longer trips, the Navigo card is more economical, more practical—and honestly, quite stylish.
Buying a Physical Card at the Station:
- Look for a ticket machine or station counter.
- Select your language.
- Request a physical card (about €5 deposit, refundable at the end of your trip).
- Add a photo, if required for your chosen pass.
- Load a single ticket, daily pass (Jour), or weekly/monthly pass (Semaine/Mois).
- That’s it—you’re ready to enter the metro stress-free.
Using Your Phone
You can skip paper and plastic — two official apps let you buy and store tickets directly on your smartphone.
1. Île-de-France Mobilités
Download: App Store / Google Play — search “Île-de-France Mobilités”
Tickets available: Single Ticket, 10-pack, Navigo Day, weekly/monthly passes
2. Bonjour RATP
Download: App Store / Google Play — search “Bonjour RATP”
Tickets available: Single Ticket, Paris Visite, airport tickets
How it works:
- Download the app and create an account (weekly passes limited to certain countries)
- Buy your ticket → it appears in the Digital Wallet. (Weekly and monthly passes only work through the official apps)
- Tap your phone at the turnstile NFC reader → green light + beep ✅
Schedules, Safety, and Rush Hours
Paris is beautiful, vibrant, and generally safe—but like any big city, the metro requires attention and a bit of awareness. No need to panic—think of these as friendly tips to keep every ride smooth and even enjoyable.
Metro Operating Hours
The metro usually runs from 5:30 a.m. to around 12:30–1:00 a.m., with some lines running later on weekends.
So if you like starting your day early, trains are already running first thing in the morning. And if you enjoy late dinners or evening walks, there are usually enough trains to get you home.
Rush Hours: Take a Deep Breath
Trains can get very crowded during peak hours:
- Morning: around 8:00–9:30 a.m.
- Evening: around 5:00–7:30 p.m.
Central lines like 1, 4, and 13 tend to be the busiest. If you’re traveling with luggage, a stroller, or children, the friendly advice is simple: wait for the next train. A little patience provides comfort and calmness.
Safety: Stay Aware, Not Afraid
- Paris is safe, but pickpockets do exist, especially in tourist-heavy stations (Trocadéro, Bir-Hakeim, Châtelet, Champs-Élysées – Clemenceau).
- Keep your bag in front of your body and your phone safely stored.
- Be cautious with petitions or strange approaches—politeness plus awareness solves most situations.
Luggage, Strollers, and Accessibility
Traveling around Paris is wonderful, but the truth is that not all metro stations are friendly to large luggage, strollers, or accessibility needs. The good news? With some planning, you can move around smoothly and enjoy every step of the city.
Luggage: Size and Practicality
- Officially, luggage should not exceed 75 cm (about 30 inches) on its longest side.
- In practice, the biggest challenge isn’t size—it’s stairs, especially during rush hours.
Strollers and Young Children
- Many stations do not have elevators, so stairs can be tiring.
- When possible, choose lines with accessible stations, such as Line 14, which is modern and equipped with elevators.
- Another good option: buses or trams, which usually offer easier boarding for strollers.
Wheelchair Users and Reduced Mobility
- The classic metro system has limited accessibility, with elevators available at only a few stations.
- Plan routes using Île-de-France Mobilités tools, which indicate accessible stations.
- Whenever possible, opt for RER, trams, or buses, which are generally more wheelchair-friendly.
Every journey feels lighter when you know you’ll be able to get in and out without obstacles. That’s when the commute becomes part of the experience—not a challenge.
Major Attractions and Their Metro Stations

The secret to using the metro in your favor is mapping attractions and lines before you go. Here are a few examples that make all the difference:
| Attraction | Station | Line |
| Eiffel Tower | Bir-Hakeim | 6 |
| Trocadéro | Trocadéro | 6, 9 |
| Louvre | Palais Royal – Musée du Louvre | 1 |
| Sacré-Cœur | Anvers | 2 |
| Montmartre | Abbesses | 12 |
| Notre-Dame | Cité | 4 |
| Champs-Élysées | Charles de Gaulle – Étoile | 1, 2, 6 |
When used well, the Paris metro is not just transportation. It’s a map, a guide, a friend that carries you calmly and safely through your itinerary. With every ride, you learn something new: a hidden exit, an old mosaic, the rhythm of the city. And then you realize—Paris reveals itself station by station, unhurried, at the right pace, like a secret shared only with those who know how to observe.
Plan Your Trip
For tours, activities, airport transfers, and skip-the-line tickets, we rely on GetYourGuide — a platform we’ve personally used and trust.
We use and recommend Omio.com to book trains, buses, and flights across Europe. It’s a reliable platform that makes comparing routes easy and helps you travel smoothly between cities.
If you’re planning a trip around Europe, you might be interested in these articles:

Discover the Magic of London: 10 Must-Visit Places for Harry Potter Fans

14 Must-Visit Beatles Spots in London + Liverpool: A Musical and Historical Journey
4 Days in London: The Ultimate Itinerary & Travel Guide

What to Do in Paris in 5 Days — A Complete Itinerary for the City of Light
